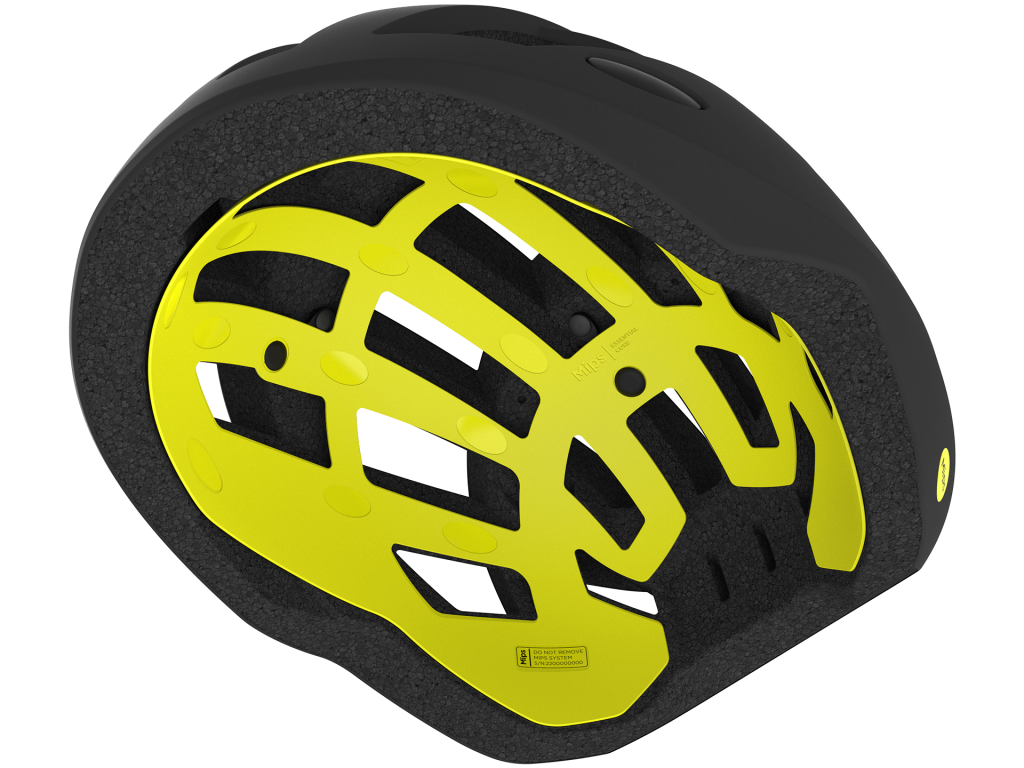

The Mips® Essential Core system is an injection-molded plastic, low-friction layer placed between the helmet’s comfort padding and its energy-absorbing liner. This permits the layers to move relative to each other, helping to reduce rotational motion to the head in certain angled impacts.
On the following pages you will find all you need to know about how we work with product branding and design on Mips Essential Core. For more detailed construction guidelines we recommend you to contact your Mips engineer.
Solution: Br
Our goal with Mips graphics is that we want to take a discreet but clear ownership of our technology with balanced graphic elements without hijacking the overall design of the helmet. Read more below on what type of graphics we work with.
On Mips Essential the branding is molded into the Low Friction Layer.

For necessary information such as, serial number, “do not remove the Mips system” and helmet model, a Side Information Label (SIL) is used. It gathers all information that needs to be on the Low Friction Layer in one space.


We offer the option to use a textile label on the helmet comfort liner if the Mips Low Friction Layer is hidden beneath.


We offer the option to use a textile label on the helmet comfort liner if the Mips Low Friction Layer is hidden beneath.

In addition to the textile label it´s possible to use a printed graphic on the comfort liner. The printed graphic makes it possible to highlight that the helmet is featured with Mips technology.

The Mips logo, nicknamed the Yellow Dot, is our most recognized brand asset. It is placed on the outside of the helmet and brings a feeling of added safety to the user.

Positioning of our graphic is key to achieve the best visibility and to keep consistency for the consumer when recognizing a helmet with a Mips safety system. Our goal is to achieve the same placement at all times. However we understand that in some cases, due to different helmet geometries and other design constrains, the optimum logo placement is not possible. For cases like these we have a 1,2,3 placement guideline.

FAMILY GRAPHIC
Primary helmet orientatins is with forehead pointing upwards. Othervise with forhead pointing to the left.

SIDE INFORMATION LABEL
Graphic is orientated on right hand side with helmed edge pointing downwords

ON HELMET LOGO
Looking at the helmet from behind the Mips logo is placed to be visible both from the left and from the rear.
When we create a new design we always adapt it to the helmet it belongs to. Naturally we make sure to cover the contact areas, but when sculpting the LFL, we analyze the exterior design of the helmet and ensure our design considers the outer expression and style.
To do this we use a defined series of design principles and elements intended to improve the perception of structural strength in the product, and to create a look of added safety.